Blog
basic-branded-masthead_1920x300
  • It’s Just “Knot” Right

    Aug 30, 2013

    knot-300x224

    Knots are a beautiful natural characteristic in wood floors; however, they can be troublesome. Knot peeling is a common issue with soft woods and can leave your floor looking poorly finished.

    If you have knots in your floors, it is likely because the knots did not have the pitch or sap “set” during the kiln dry process. Heat from windows or other sources draws the pitch to the surface pushing the finish off. Above is an extreme example of pitch bleeding back up through a knot.

    Don’t worry, this issue is preventable. Knots can be sealed with a waterbased sealer, such as Basic Coatings® Emulsion Pro™, or shellac to prevent bleeding. If the floor is properly sealed, you should not find any peeling knots. If you have sealed the floor, and you are still finding your finish pushed to the surface, we recommend you contact your floor installation company or contact Basic Coatings®.

    To repair a peeling knot, the peeling finish needs to be cleaned off the affected areas until you reach bare wood. You may need to scrape the wood if necessary. Touch up with either shellac or a waterbased sealer.

    Note: As with most spot repairs, after completion of the repair, it will be necessary to screen and coat over the whole floor to make the appearance of the coating uniform.

  • Why Basic Coatings®? Great Tips and Recommendations!

    Aug 16, 2013

    roller-300x225

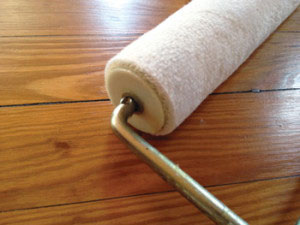
    Recommendations for Rolling Applications

    Basic Coatings® routinely tests commonly used paint rollers to ensure compatibility with all Basic Coatings Waterbased Wood Floor Finishes.  With good application methods, many different rollers will work with various finishes, but Basic Coatings has found the rollers listed below to perform best with all Basic Coatings Finishes.   If you are looking for great results, take a look at our list of recommended rollers and procedures.

    Recommended Paint Rollers for Basic Coatings Waterbased Finishes

    • 5/16” Sherwin Williams® Microfiber
    • 5/16” Wooster® Microfiber
      • Note:  Best results were found using rollers labeled for “Smooth Surfaces”.

    For bare wood, apply two coats of a Basic Coatings Waterbased Sealer with a T-bar, roller, and/or paint pad per label instructions, abrade, and tack floor with Basic Coatings Squeaky™ Cleaner before applying a Basic Coatings Waterbased Finish. For screen and recoats, use a 120 grit screen or higher for final screen, for best results use a maroon pad (3M spp) with 240 grit Gold Strips, then tack floor with Basic Coatings Squeaky Cleaner before you apply the top coat.

    To begin, use a paint pad to trim along the starting wall, pour a line across the floor boards about five to six inches wide, and condition the roller with finish.  Place the roller past the line of finish and roll back through the finish in three to four foot sweeps, roll forward through the finish again feathering up at the end.  Repeat this process in six to seven inch increments until the floor is completed.  Rollers sliding or skipping is an indication of too much finish, roll excess finish out before continuing.  Allow finish to dry 30 to 45 minutes before adding any airflow to prevent debris from collecting or skinning to occur. Finish will be ready for recoat in 3 to 4 hours depending on environmental conditions.

    Basic Coatings recommendations have been fully tested at our application laboratory and shown to work under proper environmental conditions and sound application techniques.  Recommendations are not to be considered warranty for misuse or improper application methods and should not be considered the only way to apply Basic Coatings Waterbased Finishes.  For many years, Basic Coatings products have been applied with a variety of methods from T-bars and paint pads to spray, brushing and wipe-on application.  Please contact a Basic Coatings Representative or consult basiccoatings.com for more information on application methods.

  • Take It From Us: Mike Vitti, Superior Cleaning

    Aug 09, 2013

    bc university

    Basic Coatings® is not only known for our high quality floor care products, but also for our training. We are proud to be leaders in supporting your floor care needs. Over the course of 30 years, we have trained countless wood floor contractors in a variety of areas, including product demos, application techniques, VOC regulations, floor installation, and floor repair.

    Basic Coatings has unique one-on-one training seminars for distributors and contractors across the country. Basic Coating’s training center features and impressive 700 sq. ft. sports floor area and a 900 sq. ft. mock apartment floor area, allowing our customers to train in a realistic environment and ensure optimal learning.

    “I would say this was the best residential class I’ve ever attended, and I’m very heavily into residential and have been for 20 years; therefore, I’ve attended many training programs. This class was paced well, very informative, and had great hands on training. I walked away feeling very confident that I could implement this in my business to the point that I walked into the convention center, went right to the counter and purchased everything needed and related to wood floor care.” —Mike Vitti, Superior Cleaning.

    Mike recently took part in our residential wood floor maintenance class. Our floor care experts worked with him in a hands-on training session to show him how to correctly take care of residential flooring.

    Basic Coatings works daily to stay current with advancements in floor care technology to provide you with the most accurate information. Mike Vitti is one of many successful training stories at Basic Coatings. Visit our training page to learn more about our variety of training programs designed for you and your business.

  • Staining Made Easy

    Aug 07, 2013

    staining guy

    Staining your hardwood floor can be a tricky and scary process. Stains are permanent, so it is essential that you are confident in your selection of stain color. There are many choices to be made when deciding on a hardwood floor stain, and you might find yourself overwhelmed. Here are a few tips to prevent stress and avoid staining difficulties.

    • Safety first: When staining a wood floor, make sure you protect your skin and eyes with the proper protection. We recommend wearing safety glasses and disposable rubber gloves.
    • Test strip: Test your stain color on a scrap piece of wood to ensure you like the color before you start staining your entire floor.
    • Blotches: To prevent blotches on wood, apply a thick coat of wood conditioner before you stain. The conditioner needs 15 minutes to dry before you apply your stain. It is not necessary to sand the floor after the conditioner dries.
    • Oil-based stains: Stir stain thoroughly before applying. This will prevent the dyes and pigments of the stain from settling on the bottom of the can and ensure an even-looking stain. If you choose to use an oil-based stain, make sure the room is well ventilated.
    • No fumes: If you do not want to deal with the fumes that come along with an oil based stain, try using a waterbased stain. Waterbased stains come in a large variety of colors and can be applied the same way as oil-based stains. Basic Coatings® has a large variety of waterbased products for your needs!
    • How to apply: Apply stain with a brush or a rag, depending on your preference. If you choose to use a brush, work both with the grain and against it. Apply a nice, even and thick coat of stain on the wood. For a lighter tone, make sure you wipe the stain off immediately. For a darker stain, let the stain sit for five to ten minutes before wiping off. Be sure to wipe off the excess stain going in the direction of the grain to guarantee the stain gets into the wood opposed to settling on top.
    • Water and oil do not mix: Do not mix a waterbased stain and an oil-based stain. If you want to mix stains to create your own customized color, make sure that the stains are made by the same manufacturer and are both either waterbased or oil-based. Measure the amounts of each stain used and write it down so you can duplicate the mix if necessary.

  • Don’t Slip Into a Danger Zone!

    Jul 29, 2013

    untitled

    Accident prevention is always something on our minds and it is important that cleaning professionals and flooring installation companies take added measures to ensure floors are slip-resistant. Sometimes it may be hard to understand why a floor is slippery. Here is a list of reasons why floors may seem slippery following a floor refinish.

    1.) Not cleaned properly: Often times the floor that is being refinished is not cleaned the correct way or often enough. Many times, accidents can be prevented with proper cleaning. Dust accumulations can make a floor seem slippery. Pull out those mops and wipe the dust away!

    2.) The wrong chemical was used: When looking to buy a floor refinisher, make sure you check the label to see if it is “slip-resistant.” If you are worried about having a slick floor, do not invest your money on a product that is not slip-resistant. These products are usually higher quality so they are priced higher; however, it is worth the price when you are not spending your money at the doctor’s office!

    3.) Too few or too less- If there are not enough coats of refinisher on the floor, then your result may be a slippery floor. Same goes for too many coats. We recommend you apply three to four coats of floor finish and then test for slip resistance. Apply another coat if necessary.

    4.) An oily mop: An oily or over-treated dust mop can cause a floor to be slippery. We recommend you machine scrub the floor, and then go over it with a non-oil dust mop.

    5.) Dirty tools: Make sure when you are refinishing any floor, that you thoroughly clean all your tools and cleaning supplies. Contaminants may contain oil or substances that will make your floor a danger zone.

    We care about your safety! Use these helpful hints and tips for your future projects to prevent an accident! Basic Coatings can help you with any questions you might have regarding floor care. Contact us using the web form or by calling Customer Service at 800-441-1934.

  • "Is It Dry Yet?"

    Jul 22, 2013

    gallery-1512149908-gettyimages-75403973

    If you want to ensure a long lasting finish on your hardwood floors, it is important that you allow the appropriate amount of drying time. While waterbased floor coatings are known for their fast drying times in comparison to oil-based finishes, there are still a number of factors that influence drying times for optimal results, including:

    • Amount of air movement and circulation over the drying surface
    • Film thickness
    • Relative humidity
    • Temperature

    Amount of Air Circulation
    Air circulation is very important when it comes to drying  floor finishes. Without it, the solvent and water evaporating from the finish can quickly saturate a small layer of air above the finish, causing  the rate of evaporation to slow down significantly. For example, if your floor is in an enclosed area, the amount of time it takes for the finish to dry will be much longer than a floor in a room with proper air circulation. To ensure the right amount of air circulation, you can open windows, doors or install a fan to keep the air moving. Always wait until the finish has “set up” and is tack-free before introducing air movement to prevent dust accumulation or a ripple in the finish. This will normally take 30 minutes to an hour.

    Film Thickness
    Many are not aware, but floor finishes dry from the top down. Water and solvents must migrate through the wet film to evaporate. This will cause the curing process to become slower as film thickness increases. This simply means that thicker films will take longer to dry, stay softer longer and potentially damage your newly finished floors. Make sure that the previous layer of coating is fully dried before you apply your second coat.

    Relative Humidity
    When there is more humidity in the air, there is more moisture in the air. This can dramatically slow down the drying process for your floors. If it just so happens to be humid on the day you are finishing your floors, try to increase the airflow with a fan.

    Temperature
    The last factor that can impact drying time is temperature. There are two ways that temperature can influence drying rate. 1.) Temperature increases the air’s capacity to carry vapor. This can increase the drying rate, but only if the air is circulating and moving. 2.) The cooler the temperature, the longer the drying time. When the temperature is cooler, it slows the curing rate. Your result will be a slower drying time and a softer floor.

    Waiting for your floor to finish drying can be a long process, but if you want the best results, be patient! Your beautiful floor finish will be finished drying before you know it. We recommend Basic Coating’s® StreetShoe® NXT for a fast curing finish.

X